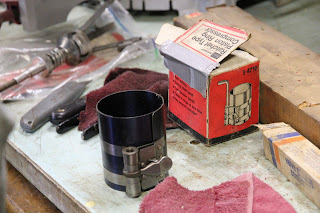
To install pistons, a ratchet type piston ring compressor was needed. Since the rings were brand new, the rings stuck out of the pistons a bit. The ring compressor wraps around the piston and squeezes the rings into place.
But first we dunked the piston in engine oil, to make it was properly lubed before installing (oil was also squirted onto the cylinder walls). Then the piston compressor was attached to the piston and the piston was positioned over the cylinder (make sure the arrow on top of the piston points to the front/fan of the engine - piston installation direction matters). The wooden end of a hammer was used tap the piston back into the engine.
One thing to note...make sure the piston compressor bottom lines up flushed with the piston bottom. In our first few attempts, the compressor was not perfectly aligned and the ring would slip out underneath before we could push the piston through the engine.
To install the pistons we had to turn the engine on the side to reattach the connecting rods. The big-end bolts that held the connecting rods in place needed to be torqued to 40 lbf ft. Cylinders 1 and 4 could be installed at the same time since they rotated on the same crank shaft cycle and cylinders 2 and 3 could be installed together on the opposite cycle of the cam shaft (turning the fly wheel rotated the cycle and raised and lowered the pistons).
 |
| The dogs are helping Chris and Fred with piston installation. |
This pretty much wrapped up a weekend worth of engine rebuilding. After the pistons were re-installed, the oil pan was attached and that's how we left for the weekend. It took 2.5 days (1 day = 9AM - 5PM with a break forlunch) of effort amongst 3 people to get to this point. Fred's assistance with this really sped things up with his wealth of knowledge, tools, and everything on hand and ready to go. We'll be back to New York mid-summer to finish the rest of the engine restoration.


No comments:
Post a Comment